So I've noticed lately that muffs with removable covers
seem to be all the rage in the costuming community. Naturally, I had to join in! I love anything that involves customization and re-usability So with that spirit in mind, I present to you a muff base:
 |
| Exciting, right? |
And also a mob cap, just for fun:
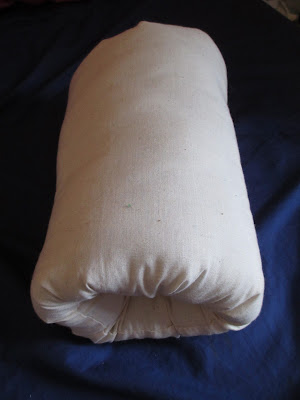
I made my muff base out of unbleached muslin from my stash and polyester stuffing from JoAnn's. I followed
Koshka the Cat's excellent tutorial. I didn't take many pictures of the process since her blog covers it all so well, but here is my muff just before I hand-stitched the opening shut:
It was both easy and fun to make. Now I'm working on interchangeable muff covers! I have at least three planned, and one is almost finished. I'll blog about it tomorrow. In the meantime, check out my
Pinterest board on
Mitts and Muffs for inspiration and examples of what other costumers have made. Let me know if I've missed any blog posts about muffs and muff covers! I love seeing all the different styles people come up with.
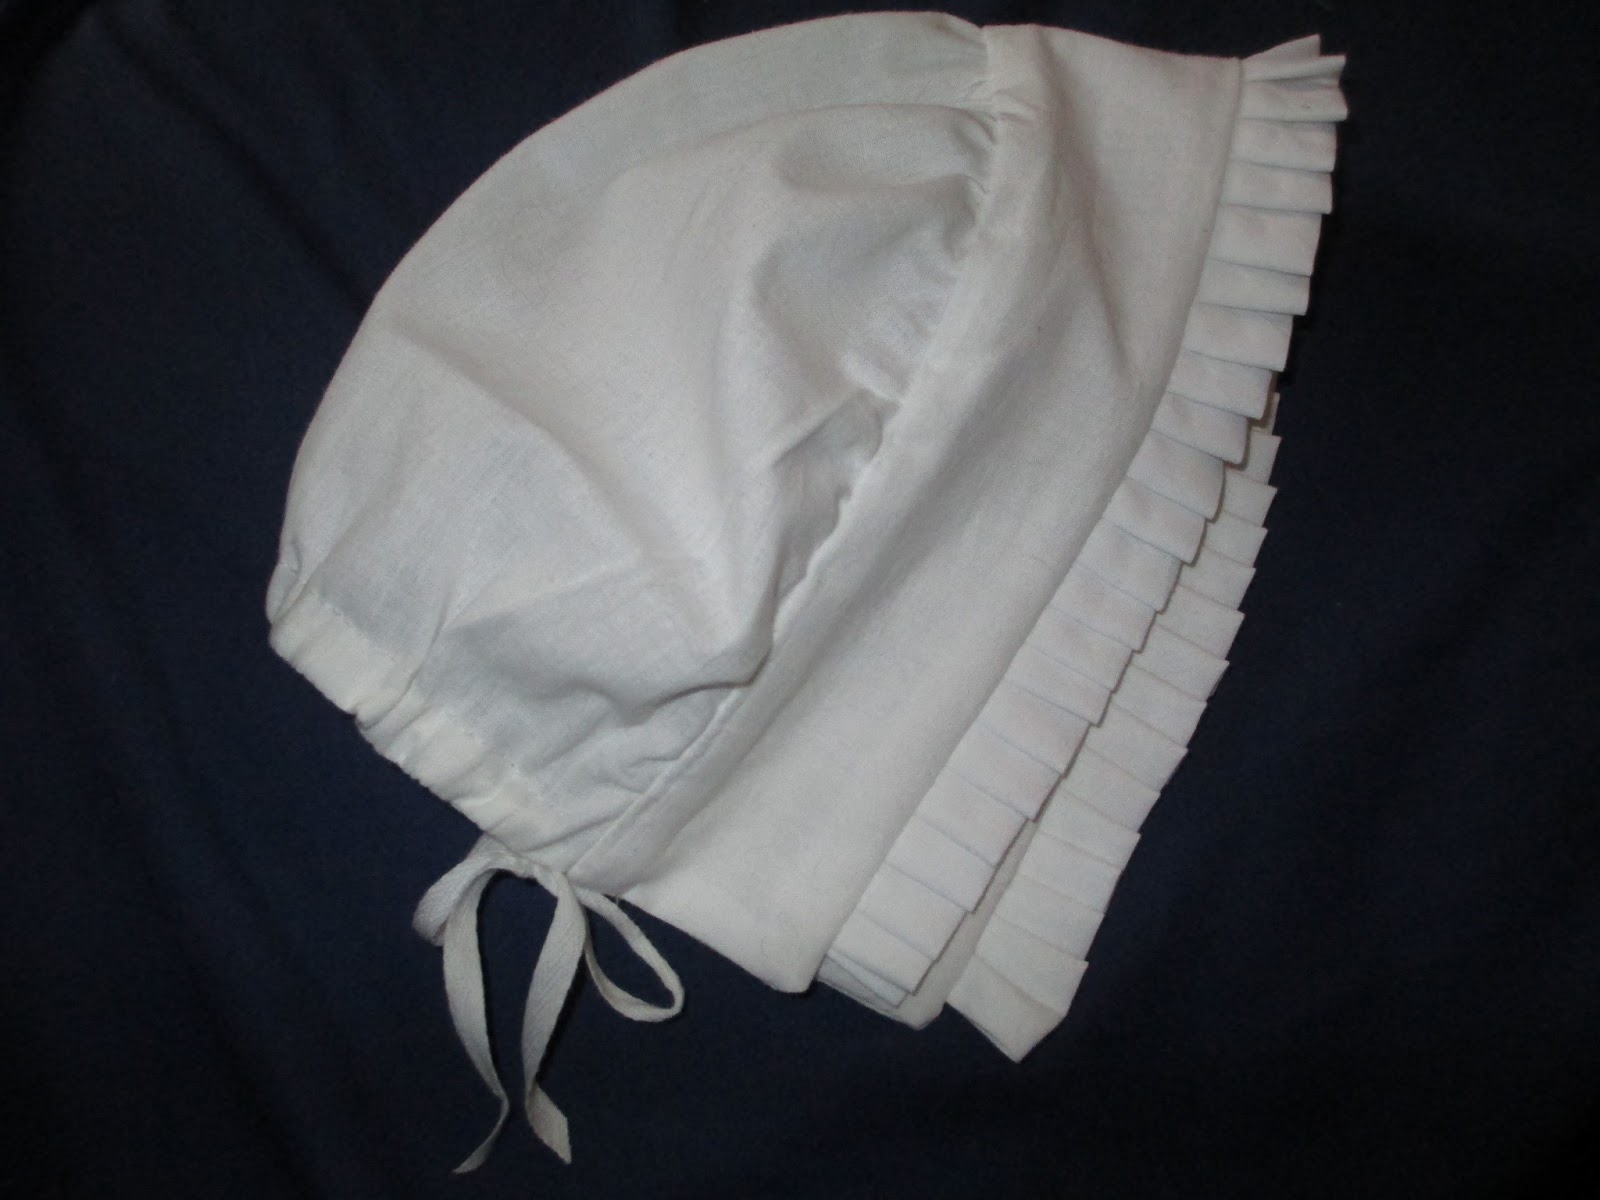
On to the mob cap! I'd been meaning to make one for quite a while now, and I feel it's the main thing I was missing in my
Curtain-Along photo shoot a couple weeks ago. (Ok, it wasn't the only thing missing, if you notice my very modern sweater in place of a gown or jacket. Still, a cap would have helped.) At the time, the only pattern I had was a very costume-y one which wanted me to use a circle to form both cap and ruffle, and I just really didn't like the look of that at all. I wanted a real cap, with proper shaping and a band around the head.
Finally, I found an extremely useful
tutorial by Art, Beauty, and Well-Ordered Chaos, via
Couture Mayah. I cut my various pieces with somewhat guestimated measurements:
The two ruffle pieces are 27" long, the bands are 19", and the half-circle was cut from the scrap left from cutting the neck opening out of my half-finished shift. Next time I will use a larger half-circle, but I hate to let any scraps go to waste!
I sewed the two ruffle pieces together to form one long piece, folded it in half and basted the long raw edges together. After giving the fold a nice press, I knife-pleated the ruffle to the band:
 |
| Here the ruffle is halfway pleated. I do so love knife pleats. :) |
I sandwiched the pleated ruffle between both bands and sewed them together along three edges, leaving the side to be attached to the cap open. I then gathered the top of the cap into the band, and also added bias tape along the lower edge of the cap to create a channel for the cord that tightens in around my head.
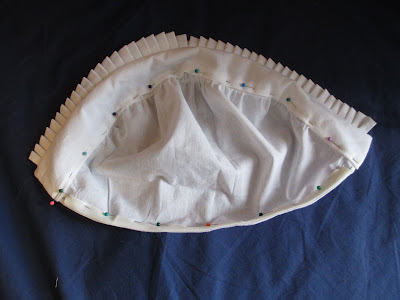 |
| At this point there's only hand-sewing left. |
I did all the stitching that wouldn't show by machine, and finished up the inside of the cap band and the bias channel by hand. Then I tried it on and tied a ribbon around it for some quick pics!
 |
| Front view |
 |
| Side |
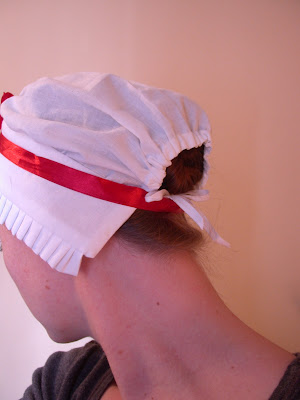 |
| Do you know how hard it is to take a picture of the back of your own head? |
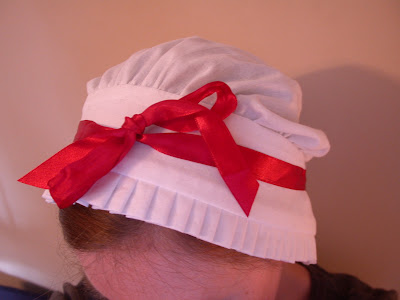 |
| Top with jaunty bow |
Like I said, next time I'll make the main body of the cap larger. I have some finer white cotton I want to use, as well as some point d'espirit for a sheer cap edged in lace. I see many variations on the horizon!


No comments:
Post a Comment